> ## Documentation Index
> Fetch the complete documentation index at: https://mintlify.hoop.dev/docs/llms.txt
> Use this file to discover all available pages before exploring further.
# AI Session Analyzer Configuration
> Configure an AI provider and risk rules to analyze ad-hoc terminal sessions in real time
This guide covers ad-hoc sessions (Web App terminal & `hoop exec` CLI). For per-request analysis on HTTP Proxy resources, see [AI Session Analyzer for HTTP Proxy](/docs/setup/configuration/ai-session-analyzer-configuration-http-proxy). For the conceptual overview, see the [AI Session Analyzer guide](/docs/learn/features/ai-session-analyzer).
## Prerequisites
* Either [create an account in our managed instance](https://use.hoop.dev) or [deploy your own hoop.dev instance](/docs/setup/deployment/overview)
* Have admin access to your hoop.dev instance
* A valid AI provider account and API key
## Configure the AI Provider
In the Web App, open the **Discover** section in the main sidebar and select **AI Session Analyzer**, then open the **Configure** tab.
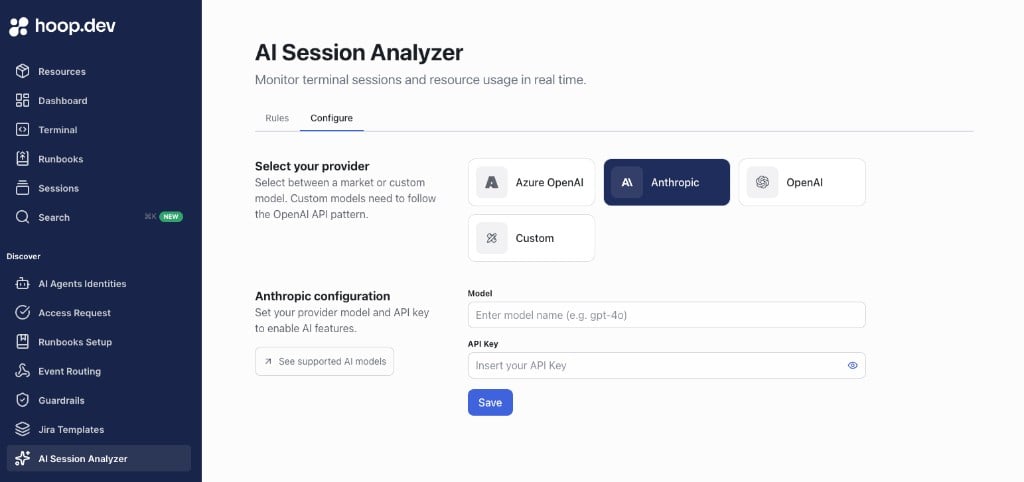 1. Select one provider:
* Azure OpenAI
* OpenAI
* Anthropic
* Custom (OpenAI-compatible API)
2. Enter the AI model
3. Enter the API key
4. Click **Save**
Required fields cannot be empty, and credentials are validated before save. On success, the UI shows: `Configuration saved.`
## Create the First Rule
In **AI Session Analyzer > Rules**:
1. Select one provider:
* Azure OpenAI
* OpenAI
* Anthropic
* Custom (OpenAI-compatible API)
2. Enter the AI model
3. Enter the API key
4. Click **Save**
Required fields cannot be empty, and credentials are validated before save. On success, the UI shows: `Configuration saved.`
## Create the First Rule
In **AI Session Analyzer > Rules**:
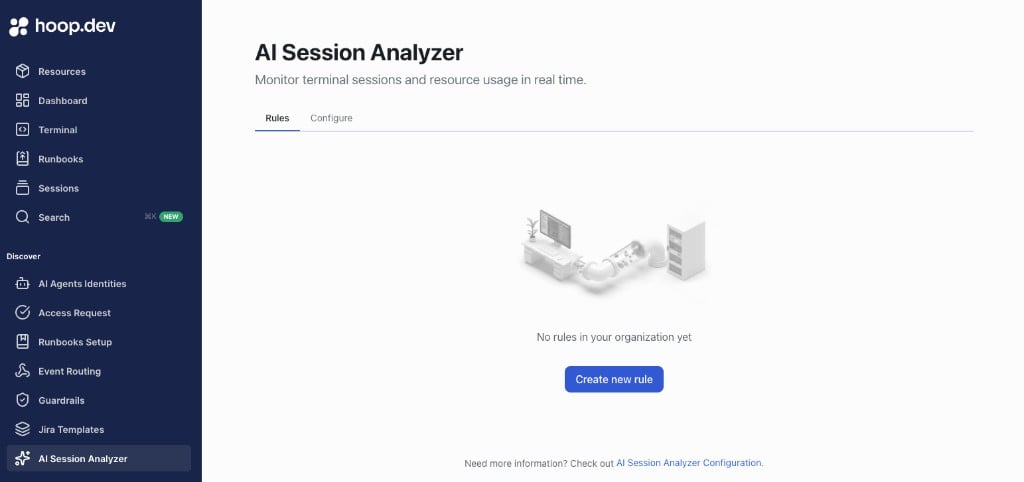 1. Click **Create new rule**
2. Add a **Name** and optional **Description**
3. Configure rule scope (roles and attributes)
4. Select risk action behavior (for example, allow or block)
5. Save the rule
## Run a Command in Terminal
Open a terminal session and run a command. The command is evaluated in real time using your configured provider and rules.
## Verify the Result
Confirm the resulting action and risk status in the terminal and in session details.
## Troubleshooting
### Rules Tab Is Empty
**Check:**
1. Configure tab was completed first
2. Provider, model, and API key are valid
3. Configuration was saved successfully
### Save Is Blocked
**Check:**
1. All required fields are filled
2. API key is valid for selected provider/model
3. Custom provider fields are complete (if using OpenAI-compatible API)
### Analyzer Not Applying Rules in Session
**Check:**
1. At least one rule exists and is active
2. Rule scope (roles/attributes) matches the current session
3. Commands are running in Web Terminal where analyzer status is shown
1. Click **Create new rule**
2. Add a **Name** and optional **Description**
3. Configure rule scope (roles and attributes)
4. Select risk action behavior (for example, allow or block)
5. Save the rule
## Run a Command in Terminal
Open a terminal session and run a command. The command is evaluated in real time using your configured provider and rules.
## Verify the Result
Confirm the resulting action and risk status in the terminal and in session details.
## Troubleshooting
### Rules Tab Is Empty
**Check:**
1. Configure tab was completed first
2. Provider, model, and API key are valid
3. Configuration was saved successfully
### Save Is Blocked
**Check:**
1. All required fields are filled
2. API key is valid for selected provider/model
3. Custom provider fields are complete (if using OpenAI-compatible API)
### Analyzer Not Applying Rules in Session
**Check:**
1. At least one rule exists and is active
2. Rule scope (roles/attributes) matches the current session
3. Commands are running in Web Terminal where analyzer status is shown